How to Detect and Remove Mold in Your Home
Mold is one of those home problems that's easy to ignore until it isn't. It can hide behind walls, grow silently under flooring, and spread faster than most homeowners expect. Knowing how to spot it early — and understanding when you can handle it yourself versus when to call a professional — is one of the most practical things you can do as a homeowner.
What Mold Actually Is (and Why It Grows)
Mold is a type of fungus that reproduces through microscopic spores. Those spores are everywhere — indoors and outdoors — but they only become a problem when they land somewhere with the right conditions: moisture, warmth, and an organic surface to feed on (wood, drywall, fabric, grout).
This is why mold almost always traces back to a moisture source. A slow pipe leak, poor ventilation in a bathroom, a basement that takes on humidity, or water intrusion after a storm can all create the conditions mold needs. Fix the moisture, and you address the root cause. Skip that step, and mold tends to return even after cleaning.
How to Detect Mold: What to Look and Smell For 🔍
Mold doesn't always announce itself visually. Here's what to look for:
Visual Signs
- Discoloration on surfaces — black, green, gray, white, or brown patches on walls, ceilings, grout, or around windows
- Fuzzy or powdery texture on surfaces that should be smooth
- Bubbling, peeling, or warping paint — often a sign of moisture underneath, which may accompany hidden mold
- Staining around vents, under sinks, or along baseboards
Non-Visual Signs
- A persistent musty or earthy smell, especially in basements, bathrooms, or closed-off rooms
- Unexplained allergy-like symptoms (runny nose, irritated eyes, coughing) that seem to worsen indoors — though these symptoms have many causes, and mold is just one possibility
- Condensation forming regularly on windows or walls
Where Mold Likes to Hide
The trickiest mold growth happens out of sight. Common hidden locations include:
| Location | Why It's Vulnerable |
|---|---|
| Behind drywall near plumbing | Slow leaks go undetected |
| Under flooring (especially vinyl or carpet) | Subfloor moisture traps humidity |
| Inside HVAC systems and ductwork | Damp air circulates constantly |
| Attics | Inadequate ventilation traps heat and moisture |
| Crawl spaces | Ground moisture and poor airflow combine |
| Behind bathroom tile | Grout cracks allow water infiltration |
If you suspect hidden mold — persistent smell with no visible source, or a history of water damage — a professional inspection or mold test may be worth considering. Surface swab tests and air quality tests are available, though their reliability and interpretation can vary, so understanding what a test does and doesn't tell you matters before you invest in one.
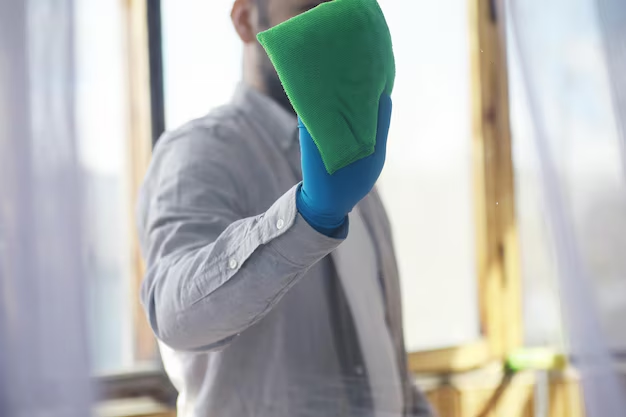
When You Can DIY Mold Removal
The general guidance widely cited by environmental health organizations draws a distinction based on the size of the affected area. Small, surface-level mold growth — roughly the size of a sheet of paper or smaller, on a non-porous surface — is generally considered manageable for a careful homeowner. Large infestations, mold on porous building materials like drywall or insulation, or any growth tied to sewage or floodwater typically warrants professional remediation.
Your own health situation matters here too. People with respiratory conditions, compromised immune systems, or known mold sensitivities should be especially cautious about DIY removal and may want to defer to professionals even for smaller areas.
DIY Mold Removal: What the Process Looks Like
For manageable surface mold — think bathroom tile grout, a small patch on a sealed surface, or mold on hard non-porous materials:
- Improve ventilation first. Open windows, use a fan exhausting to the outside, and wear an N-95 respirator mask, gloves, and eye protection before you start.
- Use an appropriate cleaner. A diluted bleach solution (typically a small amount of bleach in water) works on non-porous surfaces. Commercial mold cleaners and undiluted hydrogen peroxide are alternatives, each with different surface compatibility. Avoid mixing cleaning products.
- Scrub thoroughly and rinse. For tile and grout, a stiff brush helps reach into textured surfaces. Dry the area completely afterward — moisture left behind is an invitation for regrowth.
- Bag and dispose of materials carefully. Anything used to clean — rags, sponges — should be sealed in plastic bags before disposal to avoid spreading spores.
- Fix the moisture source. This step isn't optional. Cleaning without addressing the underlying cause is a temporary measure at best.
⚠️ Bleach doesn't work well on porous materials like wood or drywall. It can disinfect the surface without reaching mold embedded deeper in the material. On porous surfaces, affected material often needs to be removed and replaced rather than cleaned.
When to Call a Professional 🏠
Some mold situations are beyond DIY territory. Consider professional remediation when:
- The affected area is large — general guidance often points to areas larger than roughly 10 square feet as a threshold for professional involvement, though this is a rule of thumb, not a hard limit
- Mold has penetrated drywall, insulation, or structural wood — these materials typically need removal, not cleaning
- The mold returned quickly after previous cleaning, suggesting an unresolved moisture source or deeper infestation
- You have health vulnerabilities that make exposure higher risk
- The mold is linked to sewage backup or significant flooding, which introduces additional contamination concerns
- You can smell mold but can't find it — professionals have tools (moisture meters, thermal imaging) that can locate hidden growth
A qualified mold remediation professional should assess the situation, contain the affected area to prevent spread, remove damaged materials, clean and treat surfaces, and verify the work is complete. Ask about their process and whether they offer post-remediation testing if that's important to you.
Preventing Mold Before It Starts
Detection and removal solve an existing problem. Prevention reduces the odds of facing it again:
- Control indoor humidity. A dehumidifier in damp spaces and exhaust fans in bathrooms and kitchens make a meaningful difference. Most guidance targets indoor relative humidity below a certain level — typically somewhere in the range that feels comfortable without feeling damp, though specific targets vary.
- Fix leaks promptly. A slow drip under a sink or a roof that loses a shingle after a storm can create significant mold within days under the right conditions.
- Ventilate consistently. Attics, crawl spaces, and bathrooms all need airflow.
- Dry wet materials quickly. Carpets, walls, or belongings that get wet should be dried within a day or two to reduce mold risk significantly.
- Inspect regularly. Under sinks, around water heaters, along basement walls — a periodic look at vulnerable areas catches problems before they compound.
The Variables That Shape Your Situation
How serious a mold issue is — and what the right response looks like — depends on factors specific to your home and circumstances: the type of mold present, how long it's been growing, the materials it's affected, your local climate, your home's ventilation and construction, and your own health profile.
Understanding the landscape helps you ask the right questions and recognize when a situation is routine versus when it needs expert eyes.